
There are standard procedures that must be followed to insure safe, effective Microlief™ Therapy treatments.
- There are specific regions on the horse’s body where Microlief™ cannot be placed.
- There are specific conditions, which if present, are contraindications for Microlief™ Therapy.
- There are special procedures for activating the Microlief™ Power Supply through the equine hair coat.
- Every Microlief™ unit must be safely secured with protective bandaging, no exceptions.
To check for contraindications and regional warnings for using Microlief™, please review the Contraindications page of this website.
Equine Hair Coat Considerations

Conductvity Gel
The hair coat in the region to be treated must be clean. Optimally, the hair coat will also be short. It is not necessary to shave the hair down to bare skin.
The area that will be directly under the Microcurrent Electrodes must be lubricated with an electrical conductivity gel in order for the Microcurrent Power Supply to activate. If the hair coat is short and thin, you will only need a small amount of conductivity gel.
We have found that it is easier and faster to apply the conductivity gel to the back of the Microcurrent Electrodes rather than directly on the horse’s coat. We recommend and supply with every Microlief™ Kit, a hypoallergenic, water soluble, non-staining conductivity gel.
Protective Bandaging
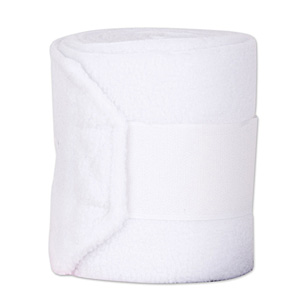
Polo
The method of securing and protecting the Microlief™ unit will vary depending upon the region of the horse that you are treating and your personal preferences. Every Microlief™ Protocol requires some type of protective bandaging.
The lower leg protocols employ the use of polo wraps or Standing Bandages with which most horsemen are comfortable and familiar. Standard cotton wraps will do the job. It is safe to put Microlief™ under ceramic wraps. FYI, research indicates that combining ceramic fiber wraps with microcurrent provides greater circulation benefits than using ceramic fiber wraps alone.
Protocols for the hooves and regions above the lower legs require some extra effort and ingenuity.
-
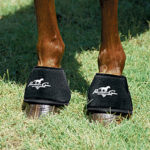
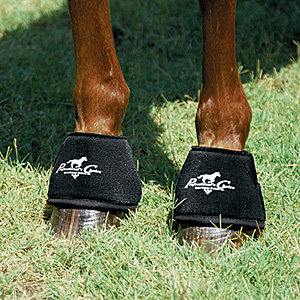
- Bell Boots
-
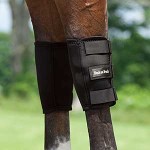
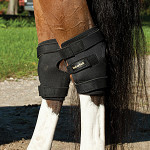
- Knee Boot

-
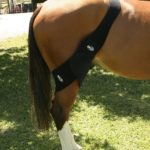
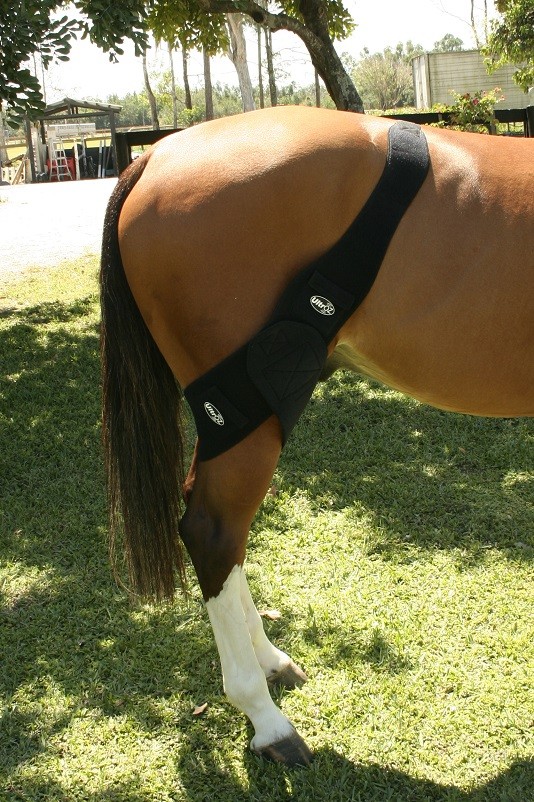
- Stifle Wrap
-
- Hock Boot

Microlief™ Placement Guidelines – “Frame the Pain”
For each Microlief™ Protocol there will be some latitude as to exactly where you place the Microcurrent Electrodes. The general rule of thumb to remember is “Frame the Pain”.
In general, the Microcurrent Electrodes can be placed either:
Cranial and Caudal to the painful area (Above and Below)
OR
Medial and Lateral to the painful area (To the Left and Right side ).
There are specific placement guidelines for acute injuries of lower leg tendons and ligaments. This information is discussed in the Injury Recovery and Rehabilitation section of this site.
The microcurrent will continuously flow
through the area of the horse’s body that is between the two Microcurrent Electrodes
AND
through the entire length and width of the area directly under the two Microcurrent Electrodes.
Make your Microcurrent Electrode placement decision upon visual inspection and manual palpation of the region.
You can perform multiple Microlief™ Protocols at the same time on an individual horse. We recommend performing no more than 6 treatments at the same time.
The effectiveness of your Microlief™ Therapy treatments is dependent upon:
Proper problem evaluation and identification
Selecting the proper placement locations
Applying and securing the Microlief™ unit properly
Allowing adequate treatment duration time
Microlief™ Standard Procedures – “Round Up the Usual Suspects!”
Every Microlief™ Protocol follows these standard procedures:
Identify the treatment area and Microcurrent Electrode placement areas.
Snap the Microcurrent Power Supply on to the Microcurrent Electrodes.
Gently remove the Electrodes from their Storage Square and flip them over so that the gel matrix side is up.
Lightly apply the Conductivity Gel over the gel matrix of each Electrode.
Apply the Electrodes to the selected placement areas on the horse. Smooth down each Electrode by applying finger pressure to the full length of each Electrode. Both Electrodes need to make firm, full contact with the horse’s body.
Make sure that there is a bit of slack in the wire that connects the Electrodes. If there is not any slack in the wire, the Electrodes will be pulled out of place when you apply your protective bandaging.
Make sure that the red light on the Power Supply is blinking. This means that the Microlief™unit is working.
Properly secure the Microlief™ unit with protective bandaging. Make sure that the Electrodes stay in the target placement area and make sure that the Power Supply red light keeps blinking.
Relax. Microlief™ is on the job.
Trouble Shooting
If the red light on the Power Supply is not blinking, check the following:
If you have previously used this Power Supply, is the battery life used up? Each Power Supply has a product life of 240 hours of use.
Are the Electrodes correctly snapped on to both ends of the Power Supply?
Is there enough Conductivity Gel on each Electrode? If the horse has a longer hair coat, a greater amount of Conductivity Gel will be required.
Is each Electrode making full, firm contact with the horse’s body?
Treatment Duration
The duration of the Microlief™ treatment will vary based upon the specific reason for treatment.
Microlief™ therapy operates on a very low electrical current. The stimulation is extremely mild and gentle. Microlief™ stimulates the body’s natural healing processes. The goal of Microlief™ therapy is to restore homeostasis and reestablish normal cell metabolism. Pain relief may be experienced within minutes, but the full healing process requires adequate time. We recommend a minimal of 12-14 hours of treatment time. Removing the Microlief™ unit too soon may prevent the achievement of optimal results.
For Daily Injury Prevention, Optimal Performance, and Competition Prep and Recovery, the ideal Microlief™ treatment time is overnight (12-14 hours).
For specific Injury Recovery and Rehabilitation a longer treatment time is required. The treatment duration will depend upon:
The degree of severity of the injury
How well the individual horse responds to the Microlief™ therapy
Monitoring Procedures
Horses wearing Microlief™ units should be visually monitored and palpated at least every 24 hours. The following variables need to be checked:
Is the horse comfortable? Discontinue use if the horse shows signs of discomfort.
Palpate the treatment area. Does the horse show less pain upon palpation?
How does the treatment area look? Make sure that the tissue is not irritated. Check the area between the Electrodes and the area underneath each Electrode. Discontinue use if the tissue is irritated.
Are the Electrodes still in their proper place and secure?
Is the Power Supply still working? Make sure the red light is still blinking.
Does the Conductivity Gel need to be refreshed?
In general, Microlief™ therapy can be performed continuously on one location for up to five consecutive days. After five days, remove the Microlief™ for 24 hours. If you are treating an injury with a long recovery time and need to reapply the Microlief™, slightly change the placement location of the Electrodes.
Post Treatment Tips
The Microlief™ unit
When the Microlief™ Protocol is complete, you need to remove the Microlief™ unit and store it safely.
The Microcurrent Power Supply has a battery life of up to 240 hours. Disconnect the Power Supply from the Microcurrent Electrodes and return it to its Storage Shell.
If the Microcurrent Electrodes are not too worn, they can be reused.
Examine the Electrodes when you take them off the horse to make sure that the gel matrix on each one is intact. If the gel matrix is compromised, the Electrodes must be discarded.
If the gel matrix is intact, place the Electrodes back on their Storage Square. For best results, store the used Electrodes in a place away from heat and humidity.
The Horse
If there is any residual electrical conductivity gel on the horse’s hair coat, it will easily clean up with a little soap and warm water.